Keeping objects opaque makes Arnold render much faster. When we render a bunch of hairs, min pixel width is useful to make the hair look softer. However, if the min pixel width is not equal to zero, the opacity of hair ribbon would change subtly, and those ribbons are not always opaque anymore! Furthermore, according to the ribbon thickness measured in screen space at render time, we might surprisedly get different render results. Thus, special care should be taken to tweak this parameter under various circumstances.
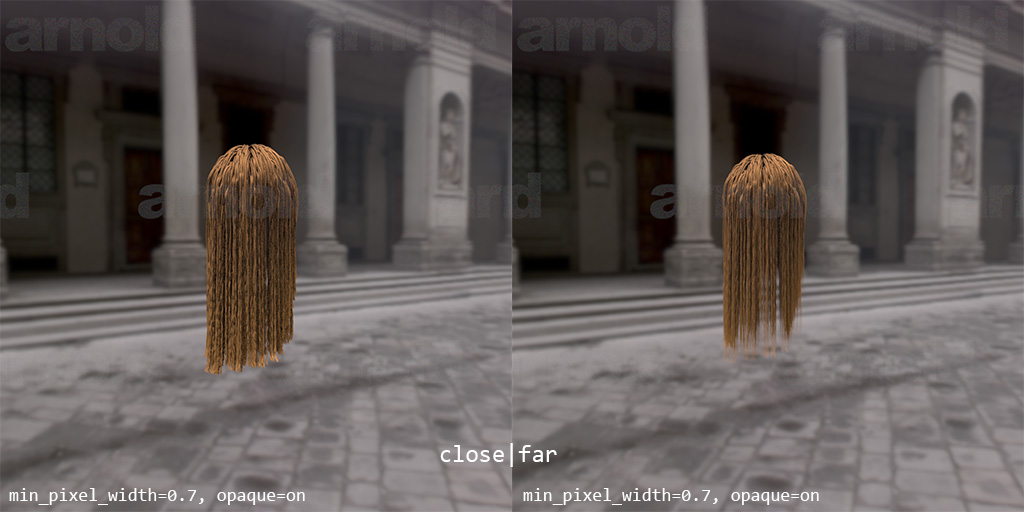
Tiny distance changes would make different results.
Min Pixel Width & Opaque
Min pixel width is used to resolve aliasing problem by enlarging the ribbon thickness and decreasing its shading opacity at the same time.
The opaque mode of ribbon from Maya hair would be switched off when:
- HairSystem:opaque is off, or
- HairSystem:min_pixel_width takes effect (i.e. the raster size of ribbon is smaller than
min pixel width)
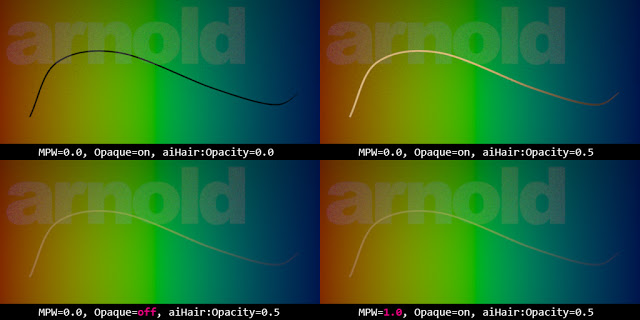
It’s not recommended to enlarge thickness of opaque ribbons by mix pixel width directly, because this would not keep ribbons opaque all the time. Besides, there is a potential pitfall which would increase the “depth complexity” of each ray. Since when a ray traces toward semi-transparent objects, it has to trace all the way through the scene to accumulate the shading color until the resultant opacity adds to one or the trace depth exceeds the transparent depth.
Depth Complexity
Suppose there are three semi-transparent planes covering a single pixel and AA is set to 4 (16 camera rays per pixel). If we use “depth complexity” to describe the potential traced depth of each ray. The sample pattern within a pixel might look like this:
If we set min pixel width to one, each ribbon would always cover one pixel width at least. Then the depth complexity for each sample becomes three. In this situation, the worst case is all rays are tracing through three planes to compute the resultant shading color.
For production rendering, there are hundreds of thousands ribbons at least. Imaging we have plenty of nearly transparent ribbons covering a single pixel. Most rays would exhaust their transparent depth, and need more time to render each frame. The most surprising case is presented by Jesse Andrewartha in “Establishing best practices in raytracing at Sony Pictures Imageworks, p.18” [1]: 5% pixels cost 99% render time!!
Test Results
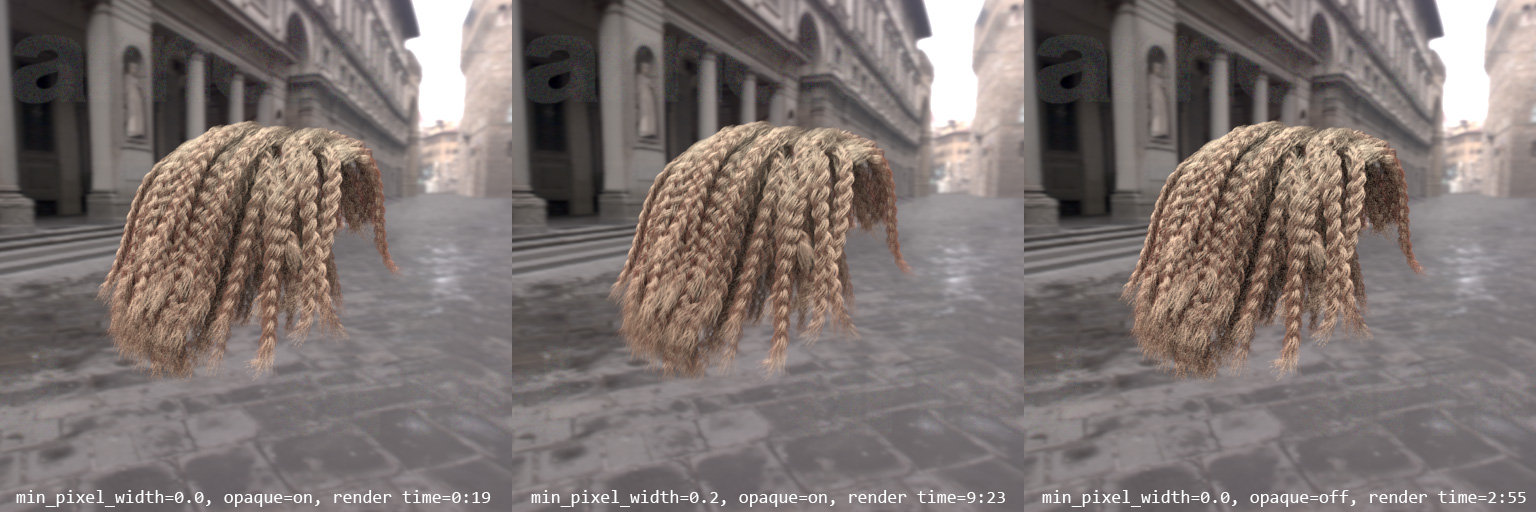
Image Size: 512x512
| Opaque | MPW | Shadow Rays | Diffuse Rays | Rays/Pixel | Render Time |
|---|---|---|---|---|---|
| on | 0.0 | 7402637 | 4775669 | 67.85 | 0:19 |
| on | 0.2 | 119529920 | 26825142 | 549.15 | 9:23 |
| off | 0.0 | 37367418 | 13250617 | 205.74 | 2:55 |
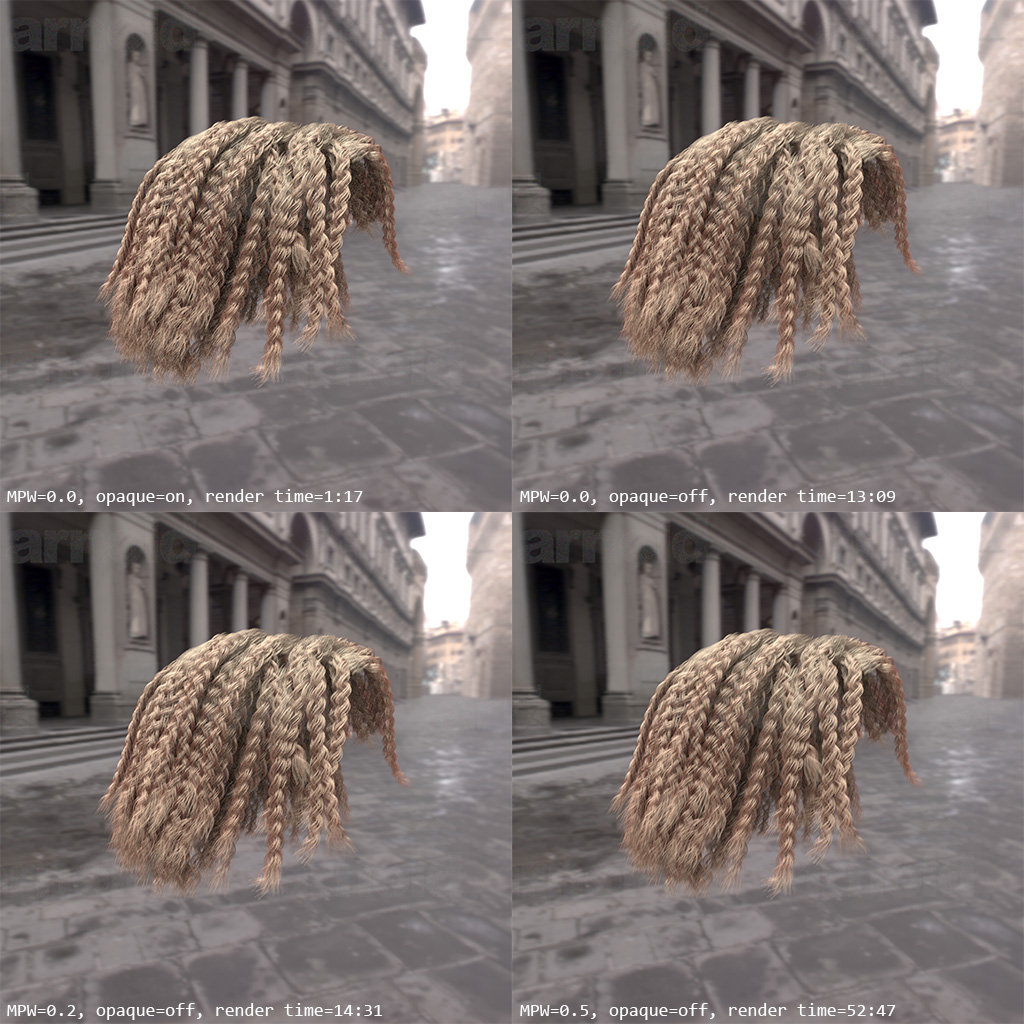
Image Size: 1K
| Opaque | MPW | Shadow Rays | Diffuse Rays | Rays/Pixel | Render Time |
|---|---|---|---|---|---|
| on | 0.0 | 31580697 | 20379657 | 70.8 | 1:17 |
| off | 0.0 | 159407301 | 56561199 | 217.87 | 13:09 |
| on | 0.2 | 179140421 | 62032101 | 240.41 | 14:31 |
| on | 0.5 | 715261105 | 139611571 | 790.75 | 52:47 |
Conclusion
For hair/fur rendering, it’s always a good exercise to expose hair density and width control to lighting artists. In addition, only use min pixel width for softness/anti-aliasing; hair thickness should be configured from HairSystem:width instead of min pixel width.
In the case of thick hair whose width is larger than the size of several pixels. If we want to make those thick hair translucent, it’s better to turn off the HairSystem:opaque and adjust the opacity from shader. Use min pixel width to switch opacity mode might not always get consistent results and have a potential pitfall which would increase render time dramatically.
References
- Andrewartha, Jesse, Søren Ragsdale, and Paul Beilby. “Raytracers and workflow: a production perspective.” SIGGRAPH 2014 Course Notes.
- Min pixel width from MtoA User Guide.
comments powered by Disqus