All photo-realistic ray-tracers are trying to solve the rendering equation. Although they are all categorized as ray-tracer instead of rasterizer, the infrastructure of each implementations are quite different (i.e. uni-directional vs. bi-directional, pure path tracing vs. works with photon-map or irradiance caching, etc).
Arnold is an un-bias uni-directional path tracer with a remarkable importance sampling mechanism and great memory management to achieve amazing performance excellence. However, if we blindly increase the number of ray samples for every render scene, we would not always get a cleaner imagery. Which means that when we switch from one ray-tracer to another, we had better use different strategies to adjust render settings. Here is the summary about what I’ve learned from experience, hope it would help any Arnold user. :)
General
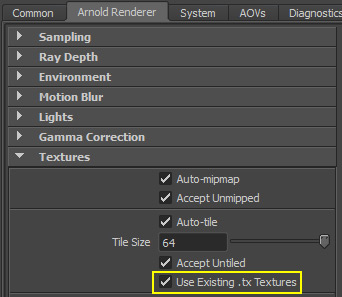
- Always using tx! It can significantly reduce I/O time!
- Change log verbosity to
Warnings + Info. This is very useful for render process diagnosis.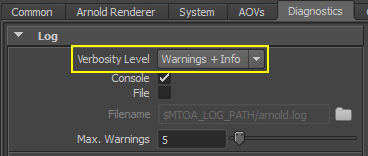
- Configure file output

- Set compression format to
zipsand enablehalf-precision,auto-cropto save storage. Turn offThis is only valid before Nuke 7. Reading tiled EXR in Nuke 9 is 25 times faster. Besides, scanline EXR has memory overhead when rendering many AOVs. So let’s turntiled, since most compositors prefer scanline format.tiledON now!
- Check output log for any missing or broken textures.
- Arnold will stop rendering process immediately when it fails to access target textures.
- Use
aiUtilityto examine the problems of geometry such as:- over-smoothing (tessellation) mesh
- The number of triangles would affect the render performance since ray tracer needs to load all the objects in the scene before tracing.
- face penetration, discontinuous tangent/normal vectors, etc
- Those problem would cause discontinuous shading artifacts.
- over-smoothing (tessellation) mesh
Linear Workflow
The best practice of photo-realistic rendering should be done with linear workflow. Maya supports color management after Maya 2015, but few things should be noticed. When we turn on the color management in Maya:
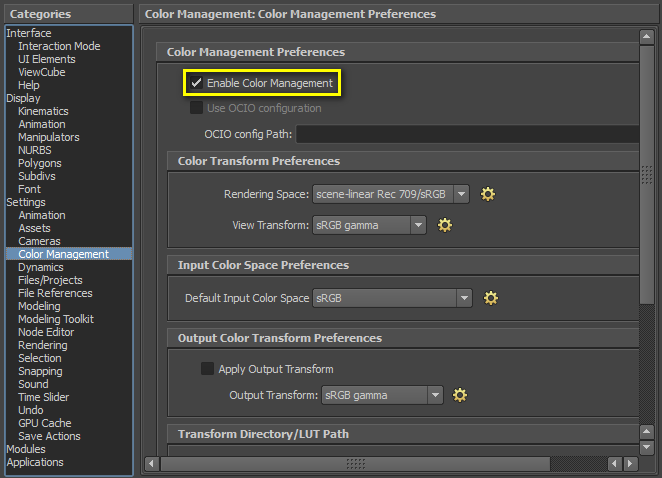
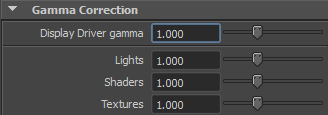
We need to set all parameters in gamma correction to 1.0 and set display gamma to sRGB, Rec 709, etc:

The last thing is that MtoA doesn’t support color space configuration in file node currently (v1.2.4.3).
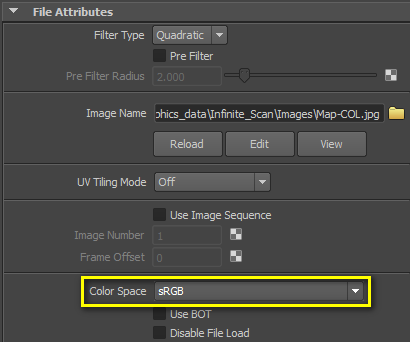
We could use extra gamma nodes to convert images to linear space, but the recommended approach is to use following command to convert the color texture file to avoid run-time shading overhead: maketx –colorconvert sRGB linear path-to-image
Look-Dev
- Ensure “Energy Conservation” (i.e. outgoing energy ≤ incoming energy)
- In physically-based setup, the energy of each ray should not get higher after each bounce, or you might get fireflies in your render images. There are two approaches to ensure this:
- Make sure the sum of relevant parameters is less than one, or
- Turn on Fresnel for diffuse/specular/reflection/refraction
- Avoid unnecessary transparent setting.
- It might be helpful to use set-override to switch the
aiOpaqueattribute for LOD. (We can switch aiOpaque on for the objects which are far from camera.)
- Use
aiRaySwithto simplify the shading of indirect bounce (the detail is beyond this post). - If possible, avoid blending multiple material shaders (e.g. aiStandard, aiSkin)
- Try to compose the control parameters into textures and connect those textures to a single shader.
- Since each material shader would spawn rays to compute a resultant color, thus the more material shaders we use in a single shading network, the more rays are fired for a resultant color computation, or
- Try using alLayer in alShaders [1] for complicated mixture materials.
- In general case, try to use specular rather than reflection in aiStandard.
- Unlike specular, reflection would not sample the lights!
- Prefer mesh light over emission in aiStandard.
Lighting
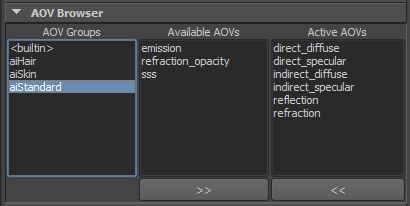
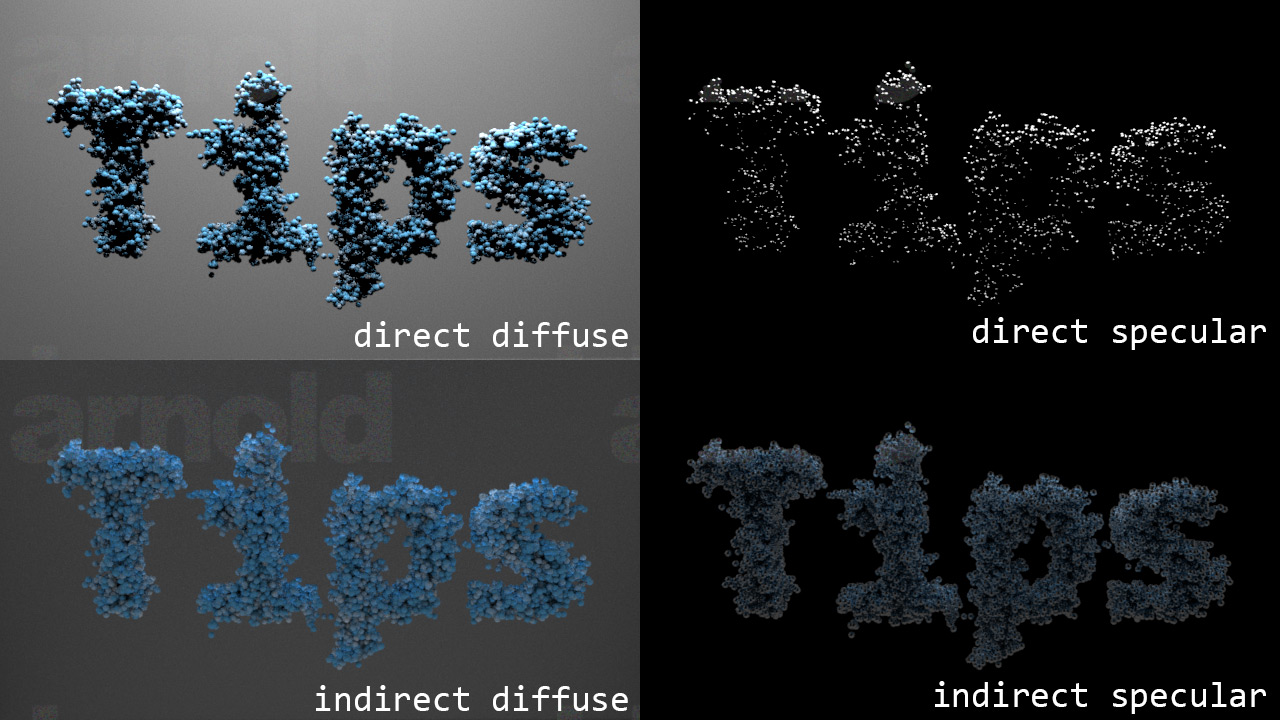
- Before up-sampling to remove the noise, examine each AOV for the source of noise first!!
- Keep the number of rays/pixel in a reasonable range
- As mentioned in [2], 2000~3000 rays/pixel is not uncommon in “The Amazing Spider Man 2”.
- The rule-of-thumb is to strike a balance between AA and other ray type samples:
- AA ↑, Diffuse/Glossy/Refraction/SSS/Light ↓ or
- AA ↓, Diffuse/Glossy/Refraction/SSS/Light ↑
- When motion blur is on, reset all sample number to 1 and increase AA sample from 5 progressively.
- Remember, the actual sample count is the square of the value of the sample attribute.
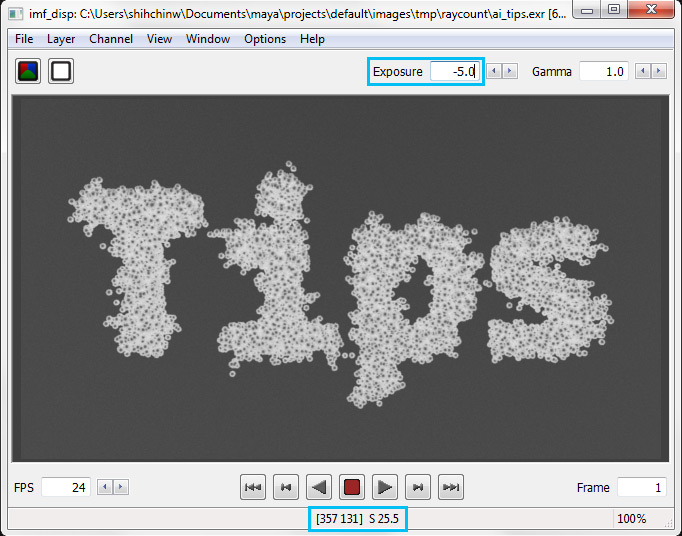
- Check CPU & ray-count AOVs to examine the performance bottleneck.
I personally use imf_disp (provided by mental ray :D) to view EXR files. When we examine the image whose pixel values are higher than 1, we have to decrease the exposure value for better visual display. In addition, the status bar at bottom would show the pixel value pointed by the cursor.
- For the objects which need relatively high sample count compared to the rest of the scene, separate them into another render layer with extra high samples. (e.g. complex refractive geometry or rough specular object)
- Avoid unnecessary ray depth.
- Do we really need a second/third bounce diffuse/specular in outdoor scene? If there is no or tiny visual differences, it would be better to keep the ray depth as shallow as possible.
- Use a dummy geometry (whose primary visibility is off) as bounce card.
- Prune unnecessary lights which contribute low energy to the scene.
- Hide unnecessary objects which has no impact to the render image [4].
- It might be helpful to use a frustum to hide objects far away (i.e. visibility culling)
- Use
min pixel widthwith care for hair/fur rendering, it would change opaque mode subtly. [[more details]({% post_url 2015-09-24-using-min-pixel-width-with-care-in-arnold %})]
Feedback
SosoyanNot sure about to Turn off “Tiled”, because in this case raw buckets are being stored in the memory until the render finished. First you are getting waste of memory especially if you have many Aovs you can get around 1.5GB more than tiled, second while tiled is on you can view your unfinished render in progress for example with RV.
In terms of scanline thing, I assume this post is to old, because Nuke 9 is fine with tiled Exrs now.
References
- alShaders. Wonderful 3rd party physically-based shaders developed by Anders Langlands.
- Raytracers and workflow: a production perspective, SIGGRAPH'14 Course Note
- There are many in-depth optimization tips for SPI Arnold (but some concepts are the same in Arnold). Highly recommended! A must-read document for Arnold users.
- VFX Tiger and Tips Using The Arnold Renderer by Animation Mentor
- Repasky, Zachary, et al. Large Scale Geometric Visibility Culling on Brave. PIXAR Technical Report. 2013.
comments powered by Disqus